How it works
How professional pool leak detection works
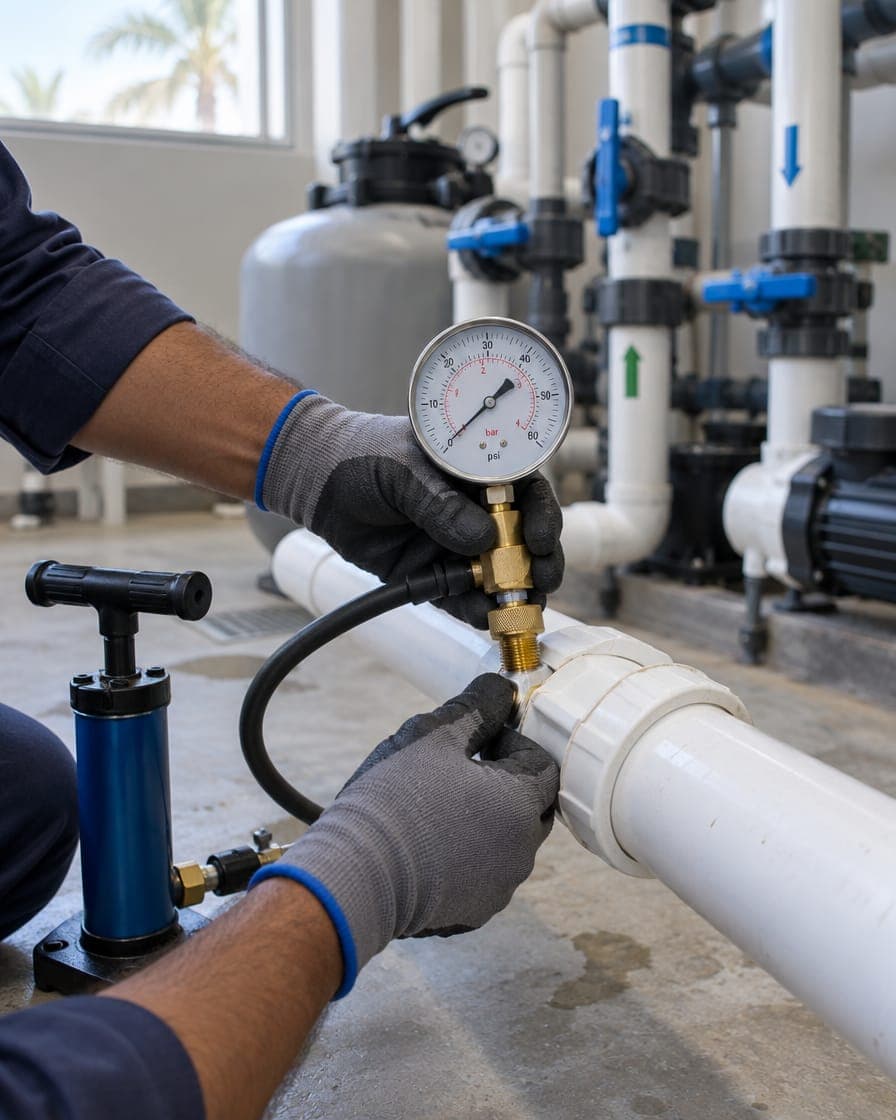
How do pool leak detection companies find a leak?
A leak detection specialist first confirms and measures the loss, then inspects the usual leak points, uses dye to confirm suspected spots, pressure tests each pipe line in isolation, and finally pinpoints buried leaks with listening equipment. The aim is to know exactly where the leak is before anyone breaks tiles or cuts the deck.
What the specialist is trying to answer
Good leak detection works through three questions in order:
- Is the pool actually leaking, and how much?
- Which part is leaking: the shell and its fittings, the pipework, or the equipment?
- Where exactly is the leak, so the repair opening can be as small as possible?
The methods below are the standard toolkit. Not every job needs all of them, and a good specialist will explain why they chose the steps they did.
Step 1: confirm and measure the loss
Expect questions before any equipment comes out. LeakTronics, a manufacturer of leak detection equipment and training, lists fact gathering before arrival as one of its core tips, and its guide says the first questions are how much water you are losing per day and how long it has been going on.
On site, the specialist will usually check the pump, filter, valves and auto-fill before looking in the pool, because a leak at the equipment pad is easier to find and fix than one under the deck.
Step 2: inspect the usual leak points
With the pool at its normal level and the water clear, the specialist inspects the places where leaks most often occur. In LeakTronics' experience these are, in order, the skimmer, the plumbing, light niches and return fittings. They will look closely at:
- the seam where the skimmer body meets the pool shell
- return fittings and jets
- the light niche and its conduit opening
- steps, swim-outs and any visible crack in the shell
- the main drain
Step 3: dye testing
Dye testing confirms a leak at a spot the specialist already suspects. It cannot search a whole pool.
The pump is switched off and the water left to settle; LeakTronics recommends at least 30 minutes and a calm time of day, because moving water is the main reason dye tests fail. A small, slow stream of tracer dye is released within an inch or two of the suspected opening. If the dye is drawn into a crack or fitting, water is escaping there. If it sits or drifts away, there is no leak at that spot.
The pull towards a leak is gentle and only visible very close to the opening, so dye is normally the last step of a visual search, used to prove a location before any repair.
Step 4: isolating and pressure testing the lines
Pool pipework runs underground between the pool and the plant room, so it cannot be inspected by eye. Pressure testing tells the specialist which line leaks.
Each line is tested on its own: the skimmer lines, the return lines and the main drain line. The usual method, as described by LeakTronics:
- Plug the pool end of the line with a test plug.
- Close the valve for that line at the equipment pad, so only one line is under test.
- Fill the line with water and bleed out trapped air, which would distort the gauge reading.
- Raise the pressure slowly to a low test pressure and watch the gauge.
If the pressure holds, the line is tight. If it drops, that line leaks. Pool line testing uses low pressure; LeakTronics says it works at 7 to 10 psi. Pumps, filters and heaters are isolated and are not part of the test.
The limits matter. A pressure test tells you that a line leaks, not where along the line. It also does not test the shell, the lights or the tile line. LeakTronics advises confirming a failed line with a second test before anyone cuts the deck.
Air and water together
Some specialists push a mix of air and water into a leaking line. LeakTronics notes that this creates a distinctive noise at the leak, which makes the next step easier.
Step 5: listening for the leak
Acoustic equipment pinpoints a leak without digging blindly:
- Hydrophone. Lowered into the pool to listen around fittings, drains, lights and cracks. The sound gets louder closer to the leak.
- Deck plate. Listens through concrete, paving and coping above buried pipework.
- Soil probe. Listens through soil, planting and gravel where pipes run under the garden.
The specialist filters out background noise and traces the sound to a point, which is then marked for the repair.
What you should receive afterwards
Ask for written findings, not only a verbal summary. A useful report states which tests were done, which lines held and which failed, where the leak was located, and how it was confirmed (for example a photo or video of the dye being drawn in). That report is what a repair contractor, your insurer or your building management will want to see.
The repair itself may be a separate job: resealing a fitting, repairing a pipe section, or work on the shell or tiles.
What the specialist needs from you
- your water loss log and bucket test results, with dates
- access to the plant room and the valves, and permission to switch the pump off
- the pool filled to its normal level, with clear water for visual inspection
- any drawings you have; in Dubai, plan approval submissions include a pipe fitting layout for the pool and pump room, so approved drawings can save time
- for shared or rooftop pools, written permission and access arrangements from building management
How this connects
- Problems and parts it covers
- Balance tank (source)
- Pressure test rig (source)
- Skimmer
- Acoustic leak detection equipment (source)
- Pipework
- Return inlets
- Main drain
- My pool is losing water
Questions people ask
Will the specialist need to break tiles or dig up the deck?
Not to find the leak. Dye, pressure testing and listening equipment are used to locate it first, and LeakTronics advises confirming a failed line with a second test before anyone cuts the deck. Some opening up is usually needed later to repair a buried pipe, but it should be targeted.
Does the pool need to be emptied for leak detection?
No. Dye testing and hydrophone listening need water in the pool, and pipe lines are pressure tested with the pool end plugged. Keep the pool at its normal level unless the specialist asks otherwise.
Is pressure testing safe for my pipes?
Pool line testing uses low pressure, and the pump, filter and heater are isolated from the test. Plugs under pressure can release suddenly, so keep clear of the work area while testing is under way.
Sources
- How to Find a Leak in Your Pool: A Pro's Guide to Inground Pool Leak Detection, LeakTronics. Accessed 24 Oct 2026.
- What Is a Hydrostatic Test? Hydrostatic Pressure Testing for Pool Pipes and Plumbing, LeakTronics. Accessed 24 Oct 2026.
- Pool Leak Detection Dye: How to Dye Test a Swimming Pool Like a Pro, LeakTronics. Accessed 24 Oct 2026.
- Five Tips for Detecting a Leak, LeakTronics. Accessed 24 Oct 2026.
- Technical Guidelines for Approval of Swimming Pool Plans (DM-HSD-GU34-ASPP2), version 4.0, Dubai Municipality, Health and Safety Department. Accessed 24 Oct 2026.
Next review due 24 Apr 2027
This guide explains general principles. It is not engineering advice and cannot tell you what is wrong with a specific pool. Rules change: check with the authority named in the sources before relying on them.